With Easter just a few days away, I always get the urge to turn something as ordinary as an egg into a little piece of art. It’s amazing how this humble ingredient suddenly becomes the star of the season—quite literally, in this case!
Inspired by my love for all things cosmic (and a soft spot for Star Wars), I decided to experiment with a galaxy theme this year—and I have to say, it was one of the most fun Easter projects I’ve done. Galaxy patterns are trending everywhere—from nails to home décor—so why not bring that celestial flair to your holiday eggs?
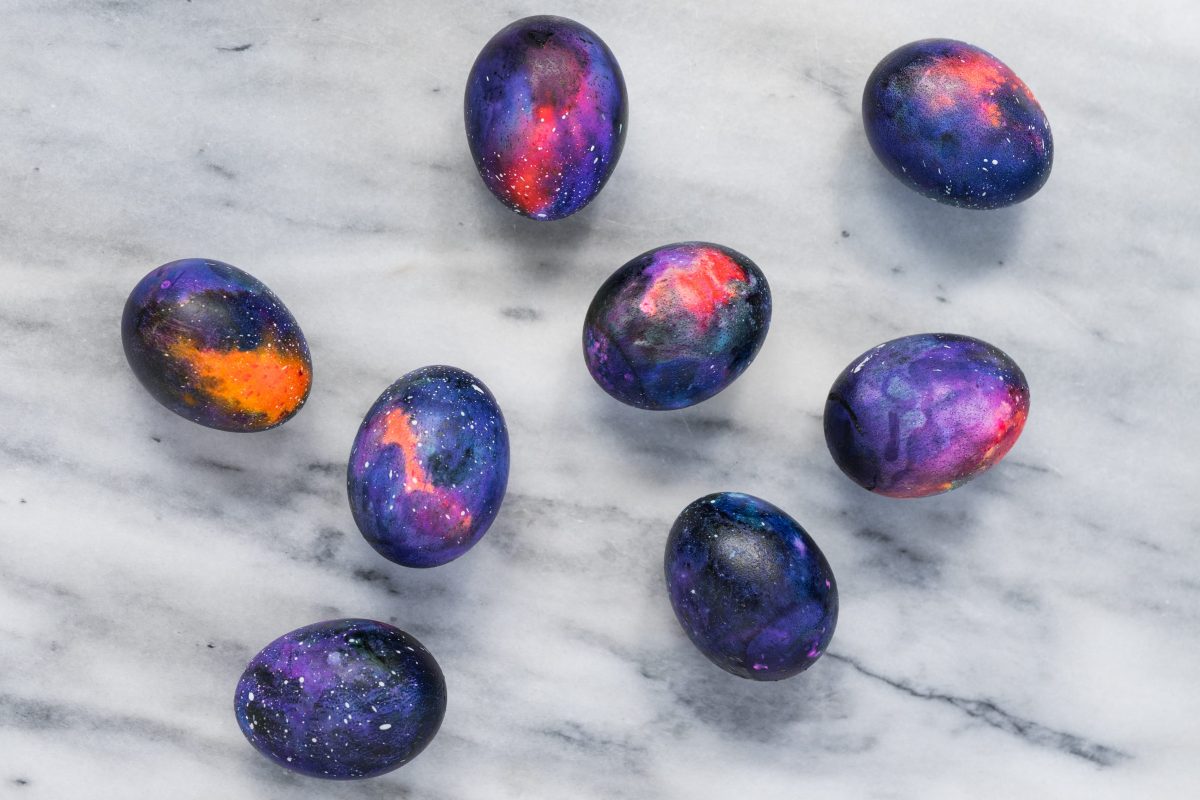
After a few messy test runs and lots of colorful fingers, I came up with a foolproof method. These galaxy eggs are bold, beautiful, and yes—they’re still completely edible! If you’re planning an Easter party or just want a creative afternoon project, this one’s a blast. Let’s dive into the stars and make some magic with a boiled egg and a little imagination.
🧰 You Will Need:
- Hard-boiled eggs
- Food coloring kit (white, black, blue, purple, rose, orange—your choice)
- Brushes (one for each color)
- White vinegar
- Disposable cups or bottle caps (for mixing colors)
- Paper towels
- Plastic wrap
- Gloves
- Small amount of cooking oil (for shine)
🎨 How to Make Galaxy Easter Eggs:
1. Prepare your surface & tools
Cover your workspace with plastic wrap. Put on gloves to keep things tidy. Dry the eggs thoroughly before starting.
2. Mix your colors
In each cup or cap, mix one drop of food coloring with one teaspoon of vinegar. You’ll need separate mixes for:
- Blue
- Purple
- Rose
- Blue+Black (for deep space tones)
Optional: Add orange, yellow, or white for extra dimension. Use a separate brush for each color.
3. Apply the galaxy colors
Work quickly. Don’t let any one color dry before adding the next. Start with lighter shades (like rose or orange), then layer on blue and purple, finishing with the darker black-blue. Brush the color on in patches. As the liquids blend, they’ll naturally form beautiful gradients and nebula-like textures.
4. Rest & partial dry
Let the egg rest uncovered for at least 7 minutes, then gently wrap it in a paper towel to remove excess color. Don’t dry completely yet.
5. Final drying
Allow the egg to dry completely for at least 3 hours.
6. Add ‘stars’
Mix a drop of white food coloring with a drop of vinegar. Dip a dry, stiff-bristled brush and gently flick white dots over the egg to mimic stars. Let dry for 30 minutes.
7. Make it shine
Rub a small drop of cooking oil over the dry egg to give it a soft galaxy-like gleam. Don’t overdo it—just enough for shine.
🌟 Tips for Best Results:
- Let eggs dry standing: Use a bottle cap or a small stand made from folded aluminum foil.
- Reuse materials: Bottle caps work great as mini color palettes instead of large disposable cups.
- Choose your egg color wisely: White eggs give brighter results, while brown eggs create a deeper, richer galaxy look.