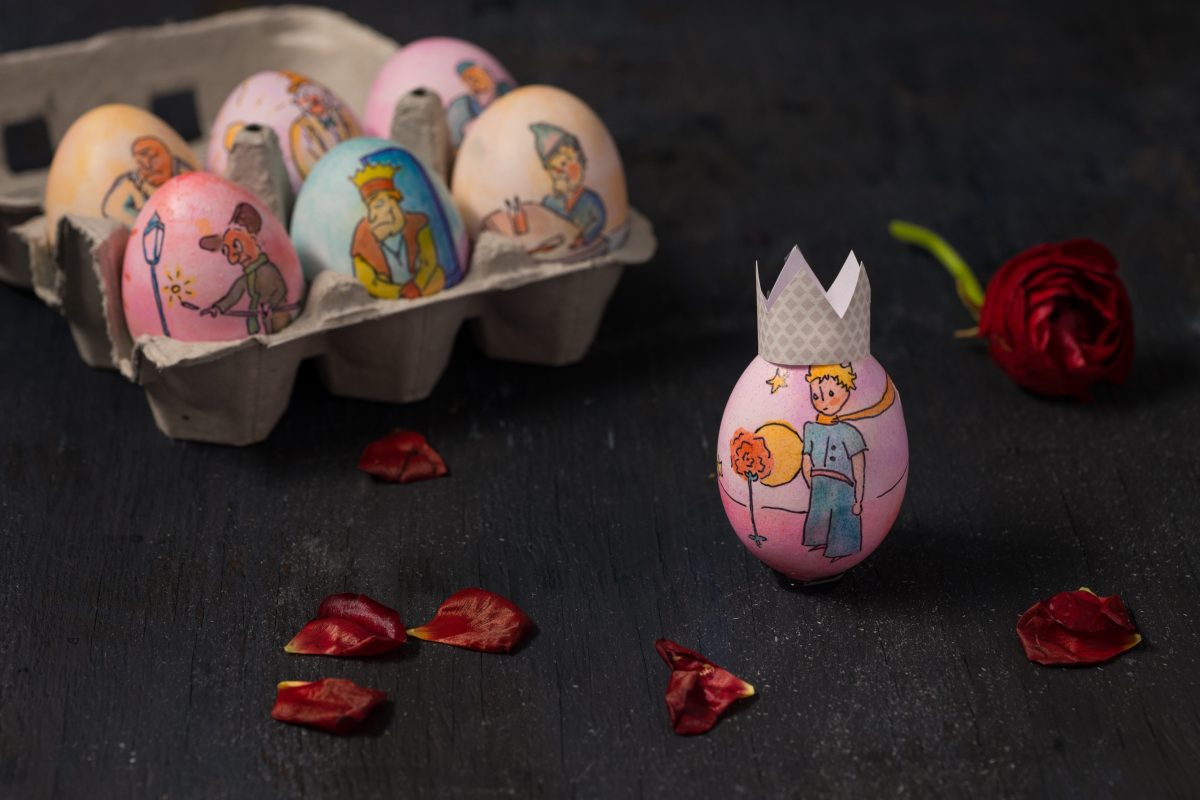
The Little Prince story is the one that touches hearts and changes minds. It reminds us of the best moments of childhood and puts a smile on our faces. If this Easter you want to create something very special for your nearest and dearest, this DIY project is exactly what you’re looking for. Release your inner artist and have fun making Little Prince Easter Eggs.
And now here is my secret, a very simple secret: It is only with the heart that one can see rightly; what is essential is invisible to the eye.
Working on this project with your children will be a perfect time to tell them a story of the Little Prince, who loves his Rose, and tamed the Fox, who travels through the galaxy speaking with the King, Drunkard, Lamplighter and other fascinating characters.
You can also use this egg design to bring something new and interesting to the Easter Egg Hunting tradition by setting a goal to collect all seven characters from the book. Kids will love this idea!
Now it’s time to get creative and have some fun painting this amazing eggs!
You will need:
- Hard boiled eggs
- Food coloring kit
- Brushes
- Pencil
- Fine black marker
- White Vinegar
- Disposable bowls or cups
- Paper towels
- Plastic wrap
- Gloves
1. Getting ready to start
Cover the surface with a piece of plastic wrap. Dry the egg with a paper towel.
2. Preparing the colors
In a separate shallow bowl combine one drop of each color with one teaspoon of vinegar and mix well. Don’t forget to put your gloves on!
3. Starting with the background
You need to paint a background with two different pastel colors, making the top look kinda like a space sky, and the bottom like a planet surface.
Take a brush and cover the top of the egg with the first color. Rinse well with cold water as soon as you applied it. Pat dry the egg with a paper towel and cover the bottom with the second color. Rinse and pat dry the egg one more time.
Tip #1: Note, that paints can behave very differently with this coloring method. To eliminate the element of surprise, we recommend you to have a few extra eggs and test the colors first. In our case green color turned blue when we rinsed it; purple, navy, rose, and red basicly became different shades of pink. In addition, we noticed that yellow and orange paints, require a little bit more time to give a saturated color. That’s why when you paint with orange and yellow, we suggest to leave the egg undisturbed for 5 minutes to let the pigment to soak in into the shell.
4. Drawing the outline with pencil and marker
Make a sketch on the egg using a pencil. Try making the lines as fine as possible.
Tip #2: If you’re looking for a drawing hack, here it is. Find an image on the web and save it. Open and change the scale to make the size of the image fit your egg. Put a piece of thin paper on the monitor and transfer the lines into paper using a pencil. Then take a piece of carbon paper and transfer the image to the egg.
Make your lines bright and bold using the marker. Let the drawing dry for 10-15 minutes.
5. Coloring
Use an original illustration as an example and start the painting. To make the process easier, keep the brush almost dry and take small amounts of paint every time you need to apply a new layer. Remember to clean the brush when changing colors or use a separate one for each color.
Use paper towels to remove the excesses of the paints.
If you want a color to be light and pastel – wipe the paint as soon as you have applied it. The sooner you will do that, the lighter the color will be. You can use this method to paint faces of the characters.
6. Drying the egg
Let the egg stand for at least 2 hours, or until it’s completely dry.
7. Adding shine
If you want the egg to be shiny, cover it with a thin layer of cooking oil.


